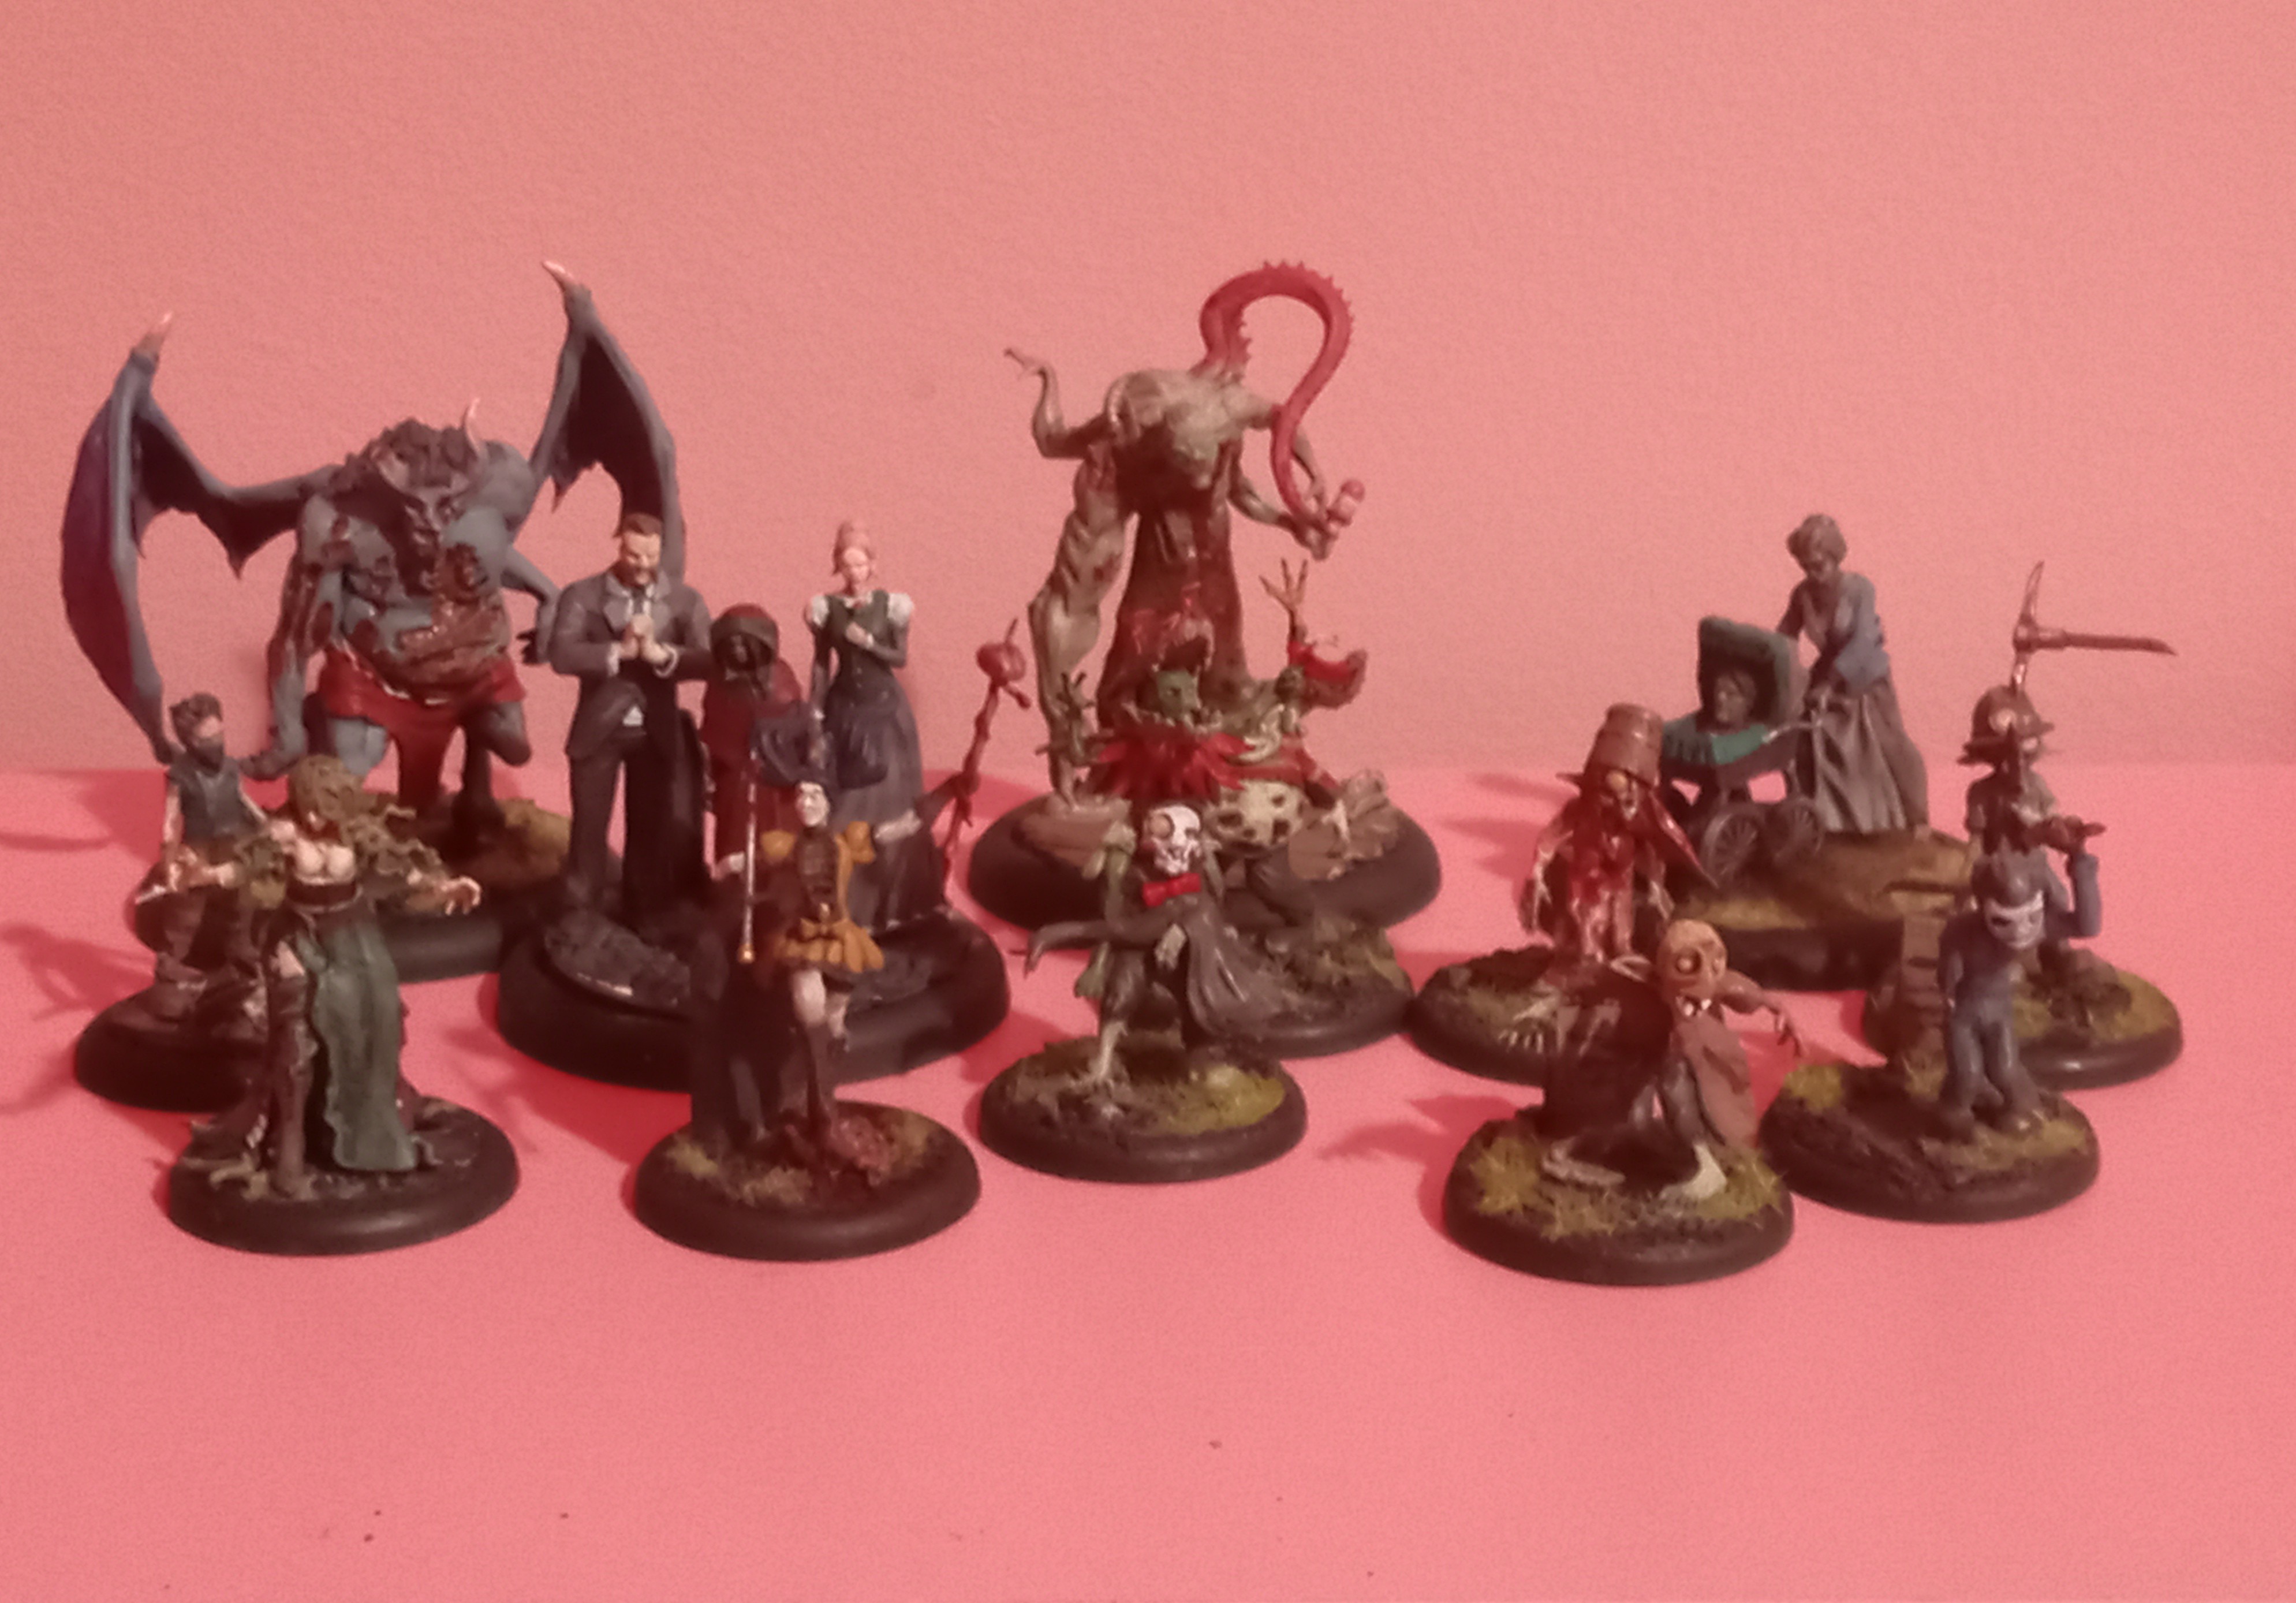
Molly is complicated. Forgotten crews have a lot of moving pieces that reward smart play and precision but can be unforgiving. Playing forgotten requires a solid grasp of the core rules and gaining grounds, and an ability to play reactively. Forgotten is also an incredibly fun crew to play and feels great on the table. Both title have strong play in most pools and most of the models in keyword are solid. Plus, Chaotic Conductor can play with zombies far more than most Resurrectionist masters. Hopefully this can help make some sense of her for those looking to give her a try.
Abandoned!
is a token shared by both titles and unique to Forgotten. Abandoned tokens are far more impactful than they may seem at first but take some getting used to in order to get the most of them. The damage on the token itself is obvious, but what can be less obvious is how powerful the tokens are for enabling other effects. Many cards in this crew have the trigger, forcing the opponent to gain abandoned or discard a card. Models have to discard if they are already abandoned so this trigger is huge for pressuring opponent resources. Many actions also receive additional effects against models with abandoned so keep in mind what models are most vulnerable to things like or . And if a model is close to dying it can be useful to crowd around and make sure that unresisted damage from abandoned goes through. Keep track of what models are abandoned, and which models are able to be isolated, and you will quickly learn how to use these tokens effectively.
is also a token that occurs in multiple places in this keyword. Learning how to maximize the usefulness of Craven is necessary as it is one of the best effects in game if used well. Wait for opportunities to put Craven on an unactivated model late in the turn when that model will be necessary for securing a scheme or strategy or drop it on models that are in scoring position to deny their score. It takes practice to know what's worth giving craven to and when it's worth giving, but this token will win you games.
Chaotic Conductor
Crew Card
The Parade of the dead crew card has a lot going on and requires some good coordination to play well. is the most straight forward: you get a raise, target gets an abandoned token. Harder to remember than it is to understand, this is free abandoned for just playing. Or you can force through the raise if you really want to give something abandoned.
is where we start getting complicated. All of your forgotten models have the ability to discard a card when they activate to move up to 4" with the option to remove a remains marker within 1" to draw a card after the move. You need to pay attention to where your remains go for this to be profitable, but this ability is incredibly strong. If you have a card in hand that you don't need the suit or value of, you need to be cycling them using Treading on Graves. If you can move 4" and replace a useless card with something that has a purpose, you can really control the flow of the game. The cards you want are crew dependent but a general tip is to look for high masks for Molly's attacks, crows for misunderstood monster triggers, and 6+ for friendly whisper, leaps, and a few other simple TNs. Any card you don't need needs to be cycled out to maximize how efficient the crew is.
is where the coordination is most necessary. For a stone any non-charge general actions your unique forgotten models take can be copied by an ally in 3". This is insanely powerful. Kicking cans in sync, dropping two scheme markers, walking a less useful model to get a schemer into position, double slamming to deny enemy markers. These actions can be given to Molly herself as well, as this is a generated action not an obey. The possibilities are endless and if you're careful with positioning and get a bit creative this ability can be game altering.
Molly, Chaotic Conductor
Leading this undead parade is Molly, Chaotic Conductor. Front of card gives Molly defenses in the form of resilient and fall in step to reposition and enemies that damage her. allows the creation of remains when you perform general actions, which is most frequently useful on charges or on general actions given to Molly out of activation via . Conductor's melee allows her to move the target, and move an ally in los up to 3" towards the target. Combined with the coordinated attack trigger and skl 7 this allows effective short range kidnaps while setting up additional damage through the coordinated attacks. Oh, and there's a slow trigger as well because who doesn't like eating an opponents AP? Her two tactical actions are both signatures and both incredibly useful. moves an ally up to 5" then pulses out TN 13 duels that will cause 2 DMG and give out distracted if failed. Triggers here can give to models who fail the simple duel, move Molly 4" towards the target, or Draw Out Secrets. Each is useful and with some experience it becomes obvious what is worth empowering for and when. Her second tactical is able to give out unresisted abandoned with knock aside and a hugely impactful stone trigger allowing an ally within 3" of the target to take an attack with a positive modifier. Keep the Keepside Strangers or Forgotten Marshal nearby to allow big damage spikes off of this trigger and you'll be begging for more chances to use it, it's just that good of a use of stones. Molly is a priority target for walk with pride as it will not only give you corpses but will also let Molly use her activations more effectively without needing to waste AP on general actions. Play aggressively and use Conductor Molly to lead your parade into coordinated attacks to maximize the damage this crew can put out.
Noxious Nephilim
Noxious Nephilim is an interesting totem. Front of card pulses abandoned onto models within 1" when damaged by an attack or trigger (not just enemy). The front also features resilient and flight, two great abilities, and very mid stats. His attack is damage 3 when targeting models with abandoned at skl 6, with to help Neph heal back up when damaged. His magic attack is a lure that moves models 5" toward Neph, or 7" if the target has abandoned. The trigger here can help wear down enemy hands while pulling them in for dmg 3 slaps. Signature at skl 0 TN 6 means you can use him for moving other friends, but it will require an 11+ to work so only use for things that really matter. Tap is here too just in case you need cards, but you should be using stones for other things in this crew.
Crew Card
is this crew's easy source of , with forgotten models giving it out when damaged by an enemy attack. There are ways to obey the attack to give an opponent abandoned but it is rarely worth doing. is one of the best actions available to your crew. The movement from it is incredibly useful for scoring, especially when combined with the ability to make schemes equivalent to the raise value for a stone. If the target has abandoned, they cannot cheat and you raise on 3s so it is possible to turn this action into the number of schemes you need at any given time. However, you need to be mindful of how many schemes you actually need within 1" of the target. Don't be wasteful with your resources, just because you can make 5 schemes at once doesn't mean removing your other scheme markers is worth it. Move your opponent where you need them and put out the schemes you need and it is very easy to lock in scoring with this action. At skl 7 it takes some bad luck for this not to go off if you're able to hold an 11 or higher until the end of the turn. I prefer this Molly for and
Molly, Harbinger of Havoc
Molly, Harbinger of Havoc is a control master that rewards you for playing reactively. Her front of card has two cool tricks in addition to average stats and meaning she is tricksy but also a bit squishy. The first trick is allowing you to arc her attacks through models with an abandoned, greatly increasing her reach. Second and likely more impactful is . Once per activation you can make a scheme when an enemy empowers or spends a stone. Keep an eye open for opportunities to use this for free scoring. Her damaging attack has the potential to burst damage off of its stone trigger and can give abandoned to models near the target on a tome. This attack is fine but not usually what Molly wants to do, use it to finish off models or hit for a random big burst of damage, but don't rely on this for consistent damage unless you want to waste the poor girl's activations. Misfit press is where her real power is, and I'll get to that in a second because it requires its own deep dive. Her tactical makes a scheme at range and lets you burn a stone to reposition an ally and have them interact. This action is once per activation but can help wrap up any lose ends on your scheme or impact the strat scoring if the stone trigger is used effectively.
gives you one of three effects, plus an extra effect for each raise, and gets a free raise if the target has an . All three effects are good, however knowing when to use each and which targets are important can be difficult. The Creeping Dread gives and and is best used when you are certain a model will score or kill something when it activates to reduce the risk of either of these happening. The Mind Unravels can be used to interact for yourself or hinder an opponent's scoring. It is usually strongest to use this to interfere with an opponent's strat, doing things like making them drop their bomb on the wrong side of the table or kicking a well-guarded can. Look for opportunities to score with this effect. The Thing in the Fog lets you move the target up to 4" which can be done before forcing the interact with The Mind Unravels. This is best used in combination with The Mind Unravels but can also be useful for denying a model sitting on an informants marker or making it look like an accident. Take the time to read each situation and find the best way to impact the score. Save Molly's activation for late in the turn and save a severe or two to push through misfit press attacks and raises, and controlling the pace of the game is achievable.
Havoc Molly is my choice for and
Necrotic Machine
Necrotic machine is my favorite dog in the game. This little robo pup has some very fun tricks to help the crew perform its best or wrap up loose ends. Front of card features letting you burn a stone for an action. This can swing strat scoring, enable a sneaky late charge, or let you use at the end of the turn to score strats that score in the end phase. Save a high card to cheat for the raises and you can guarantee schemes like or . His back of card features , a small heal, and an attack that infuses a stone for each raise. This attack might be easy to overlook but if used well it can top off your resources so the crew can abuse the trigger or any other stone dumps they have. Keep him safe and necrotic machine will put in work.
Uniques
Philip and The Nanny
Philip and the Nanny are one of the more confusing uniques in this keyword. Front of card gives some defenses with first to speak, and has an ok ability to move enemies but neither of these are great. Back of card gets very interesting. receives a positive flip on the charge and gives out with like the wind on a mask to reposition after. This attack is fine and giving out slow can be very helpful in keeping your opponent on the back foot. Philips magic attack is why you take him. It gives out but can only be used once an activation unless you receive a raise, and you receive a free raise when targeting abandoned models. Pay attention to the target sequencing and you can use this multiple times to really tarpit your opponents scoring capabilities. Triggers here can force an enemy to remove a scheme, force abandoned models to discard a card, and then there's the trigger that's shared with the Havoc crew card. This can enable additional scheming from weird angles so watch for opportunities to use this. His tactical is a slower onward that can move through enemies and causes enemies moved through to take a simple duel or gain . Solid tactical but not as good as night terrors leap for pure mobility.
Archie
Archie is complicated. On paper he seems fine, bad stats but can't be cheated into and abandoned models can't declare triggers into him. This should be decent enough defenses, but most crews have access to positive flips or can empower so it usually isn't enough to protect him. to give 8" charge and on back of card both enable him to effectively hunt scheme runners though, and that's where Archie excels. His melee is solid with triggers for extra damage, healing, and repositioning but his magic attack is his standout. 2 damage and can pulse damage to nearby enemies allowing you to target weak models and ping damage onto the stronger models. For a stone once per activation you can then take his melee targeting a model damaged by this attack with no range or lie of sight restrictions. This can allow sneaky attacks around corners or into models being body blocked, giving you options for dealing with models you can't reach outright. Archie will either over perform or die quickly, and he doesn't seem to have an in between so use with caution.
The Strange Lady
Strange Lady is one of the strongest models available to Ressers but requires careful use to maximize her impact. Her front of card gives her hard to kill, can shut down out of activation actions for a stone, and shuts off triggers when she's targeted. Combined with her hard to kill this makes her difficult to put down. Her melee is underwhelming but does slow if they are in base contact, and has onslaught and finisher to help increase the damage output. She also has a solid heal on her tactical to keep your models topped off. But her real power comes from her . Strange Lady has a 12" obey that can target friendlies at skl 6 TN 12. For a 6 you can obey any of your models, and for a high card you are usually guaranteed to obey an enemy. With proper positioning of your models this allows you to swing a strat easily on last activation, doing things like forcing an opponent to pass a boundary dispute marker to your model who then passes it to another friend to be kicked back to the enemy deployment, or making models pick up nearby bombs or evidence. If you need extra damage this can enable your beaters to get an additional attack or charge each turn or can force enemies to charge their friends. This works very well with forgotten Marshal's to remove enemy scheme and burst damage, as well as with Keepside Strangers to make their attack base 3 raise 3. Whispers also has a stone trigger to take her melee targeting the target of the obey and ignoring range and line of sight, and mutilate to increase damage or give slow. Learning to use whispers is key to strange lady's functionality but is one of the most powerful effects in the game if utilized well.
Keepside Strangers
Keepside strangers are amazing damage potential and utility in a squishy package so you'll need to be cagey with them. allows you to activate your master once strangers are done their activation and can be incredibly powerful if used well. Look for opportunities to position Keepside for coordinated attacks with Conductor before activating her with followers or use them to get Havoc into position and immediately activate her so your opponent can't interfere. They also have the ability to make a remains on activation, which is useful for and can be used to fuel their own treading. Their back of card is full of important text. Their melee action has raise 3 if they're above half health and 2 DMG which gets bumped to 3 DMG if they are attacking out of activation. This pairs well with Strange Lady's and Conductor's . The crit strike and slow triggers can really push the usefulness of this attack over the edge, either pushing damage further or kneecapping an important enemy activation. Their gun action is DMG 2 at 12" and pulses an unresisted damage onto enemies at 2" allowing them to finish off models from weird angles. It also has a mass hysteria trigger to move models damaged by it, meaning you can use this to unresisted move a tough enemy by plinking a weaker one. Their first signature is a magic attack that can target friendlies and is useful for repositioning enemies or setting up friendlies before they activate with a tome trigger to remove a friendly token from the target to deal 2 and infuse a stone. This can be used to sneakily pick off enemies OR to kill your own models and deny scoring for recover evidence while giving you 2 stones. Their last action is a signature tactical to draw up to 2 cards, one for each enemy within 2" with an entranced. Card draw is hard to find this edition so use this when you can. These guys are good but vulnerable to being spiked to death quickly so play smart with them and make sure you're getting the most from their amazing selection of actions.
The Forgotten Marshal
One of the best utility pieces in the crew, The Forgotten Marshal can do a little bit of everything. His front of card includes ally token removal, hard to kill, and a very interesting tech in . Once per activation remove a marker to deal +2 combos well with his back of card and can be used to remove enemy schemes regardless of engagement or models in base to base making it incredibly powerful. Back of card features 3 excellent actions. is a 1 damage melee that moves the target and gives out on a raise, making him a denial beast in melee. His peacebringer gives ranged damage and has a trigger to outright kill summoned models for a stone, alongside two strong triggers for more damage or heals. His last action is where things get really spicy. is an 8" range tactical that allows him to copy friendly magic attacks. This can be used to copy one of the attacks that gives out or , or used with Versatiles or ooks to create very fun combos with forgotten weapons. Copying Asuras for example allows you to remove an enemy marker, kill a zombie, and burst 6 damage at the target for a signature. Some other suggestions for attacks to copy will be included in the section on Versatiles and ooks, but good in keyword choices include rabble risers , Crooligans , and Philip's . It is important to note that copying Strange Lady's will not allow you an extra obey. The magic attack is generated by eerie echo and as such you cannot generate further actions from this, so whispers will ping a single damage and have no further effect.
Minions
Night Terrors
Night terrors are the primary option for cheap scheming in a Forgotten crew. Concealing around them makes it more difficult to land hits if they aren't nearby, flight gives them added mobility, and they have a TN 6 signature leap. Their attack isn't always relevant but can help with scoring if used wisely and is a decent utility for The Forgotten Marshal to echo. These guys are excellent schemers for 6 stones and will be a headache for your opponent if you hit those leap TNs.
Rabble Riser
Rabble risers are the trickiest minion to use well. Their demise kills the model that killed them unless a card is discarded. Note that this does not allow you to easily kill models by obeying them to attack your risers due to how obey and kill credit works. While this will occasionally be relevant most good players can play around it. Don't turn your back and hard to kill fill out the front of card allowing these to be quite disruptive. Back of card includes an option to pulse out and a magic attack to hand out abandoned both of which are very powerful for enabling the rest of the crew. The magic attack is an ecellent option for Marshal's echo. Their melee attack can also be surprisingly effective, getting positive flips into models with abandoned, and having an excellent trigger to force discards on models with abandoned. The other big thing to note is the trigger on their magic attack to give out , this is one of a few sources of craven in Forgotten and is potentially spammable with a bit of luck and maybe a few prepare actions. Rabble risers can be tricky to adjust to playing but have a tendency to over perform.
Crooligans
The last of the minions, and the ones that are potentially the iffiest, crooligans feel conflicted. 5 stones and die in one hit more often than not as coddled only does so much as their only defensive tech. By your side, an attack to hand out abandoned and forage are all excellent text on this card and has the potential to cause your opponent a real headache. Use this to kidnap opponents or set up abandoned and use forage as frequently as possible but don't expect much else.
Versatiles
Emissary
One of the best choices for Conductor, emissary is an issue in both titles but presents a huge threat in a parade crew. Terrifying Presence and access to the crew card both provide excellent value in front of card, alongside the ability to resurrect Molly if needed. Fly with Me on the back of card is one of the most useful abilities in game and helps the unpack go smoothly, especially in Havoc where multiple models need to be using their full activation doing actions that contribute to the control strategy. This fly with me has a and is only TN 5 so it is very easy to use this to transport your models. In parade you can get some excellent use from big birds attack . Since you'll be bringing remains anyway bird will enable some huge swings, and if your opponent isn't careful you can use strange lady to obey big bird to charge for unexpected big bursts of damage. Incredibly potent model and one of the best models in faction.
Effigy
Effigy has some very interesting uses in both Molly crews. In Havoc effigy is excellent at spamming the crew card , and the access to extra plays well with the control oriented play style. In Conductor the effigy is able to be used as action generation via , allowing you to take walk, slam, and prepare actions and burn a stone to give another forgotten model the same action. This is most generally useful for walks and situationally useful for the other actions. Funky little dude and almost always worth the stones.
Asura
Asura's use in a conductor crew is obvious, but there is a skill ceiling for using her well in your parade. Pay close attention to your zombie placement, the goal should be to kill them for the corpse and place the corpses where a model can use and remove the corpse to draw a card, or to allow a model to use the remains for one of their actions such as . Every corpse you generate needs to have a use, whether that be card cycling, providing markers for other models (which we'll touch on in ooks), or just giving Marshal a damage boost when other markers are scarce. Unless you need the place or know exactly why you need an extra card I would avoid spending the stone on Asura's summon stone trigger, the card draw is usually not necessary and stones are better spent elsewhere. Most Asura activations in Conductor my goal is to summon and hopefully pop a zombie off the dust to dust trigger to pulse , pop one zombie for a scheme with Macabre Infusion, and pop another to increase her attack damage setting up three corpses and reducing the number of extra activations along the way. Be careful not to over summon as you're likely to lose activation control but can regain it with a few tricks as long as your zombie total isn't too high. Also pay attention for opportunities to summon zombies into position for the -1 DF or action denial using Pulled Down. A final thing of note is how powerful copying graveyard dust with Marshal's is. Marshal can remove a marker with and kill a zombie near the target to burst 6 damage on a signature from range. This can be widely impactful of played well so look for opportunities to show Asura how to more effectively turn things to dust.
Ezekiel
Ezekiel can also do zombie summoning, and can use his intuition to be more reliable as to how many are summoned. His healing energies is also good, but your crew is unlikely to need extra healing if played well. For one stone less than Asura he's at least 2 stones less value, unless you're sick of playing with Asura like I am you're better off just bringing her in almost every circumstance
Gravedigger
Gravediggers are a bit of a trap. TN 6 onward is nice but night terrors can leap for the same tn. The extra movement for corpses means they need to be in a position to have their movement ability triggered which adds another layer of complexity for payoff that is unlikely to be impactful. And they die fast, just skip these.
Mortimer
Mortimer is an interesting choice in a parade crew. Positive flips when near remains, a DMG 3 attack that can make more remains, a magic attack to pulse injured that Marshal can copy, and a signature to replace a marker with a remains that includes a stone trigger to pulse out tn 14 duels that give out injured and a damage. At 8 points he is a very strong beater for conductor lists but usually doesn't put in as much work as some models will at similar cost. Fun beater to mess around with but better options exist.
Grave Golem
Grave Golem is the premium beater for you parade. Turn your back on a model that is very difficult to put down as long as there's remains on the table, and decent options for movement on its signatures give this mound quite the kit. The melee attack on this can hit like a truck and all of its triggers are relevant in conductor lists. Keep it near the center of your crew so there's plenty of remains for it to teleport around to and use that huge fist. Whisper too it with Strange Lady and repeat that huge fist.
Old Hob
The more fun choice for beater, Hob is still excellent for dealing damage. With his upgrade he becomes a min 3 beater with the potential for 3 attacks in an activation with a charge and a psuedo charge on his tantrum. He'll make remains whenever he's damaged (great for Asura to , and his claw attack has a reposition on it. Excellent choice for strange lady to obey some attacks on. If you have the opportunity try to take advantage of the gory remains trigger on his corpse picker signature, the less direct scheming your crew needs to do the more counterplay you can do.
Oskar
Oskar is the factions premium token removal, all on an 8 stone body with a DMG 3 attack. Never a bad hire but usually outshined unless you need token removal.
Batsch and Amalie
Batsch and Amalie are an excellent versatile that contributes to a more bubbled play style. Fruiting Bodies gives positive flips vs entranced models near B&A. This is easy to set up with Forgotten Marshal. If you use to copy the stone trigger can be used to pulse ehnranced off of any forgotten models allowing you to easily set up positive flips before unloading with the rest of Marshal's kit. Back of card also features healing and a once per activation signature to move a friendly with a trigger to pulse entranced off the target. Contributes to defense, damage, and positioning making the lovers an excellent versatile pick, especially in a Havoc list.
Sloth
Sloth is the last major consideration for Versatiles. More craven, healing, movement denial and an excellent magic attack to heal and slow models that the Marshal can copy. Plays very well with Havoc Molly to enable oppressive control strategies with potential to do surprising burst of damage. Don't be afraid to try him and try using Strange Lady to make him give out more craven and slow. It's very rude.
Out Of Keywords
Sun Quiang
Sun Quiang is an incredible scoring piece for Conductor Molly. Don't mind me to allow sneaky interacts, a magic attack for Marshal to copy that gives out , study to turn a remains into a scheme. But his real potency comes from his signature Ancestral Healing. Once per activation you can use its trigger to attach a reliquary upgrade. These upgrades make Sun very good at scheming. gives Sun 3" interacts, allows sun to interact as a signature, increases movement for one move, and can lock a model in engagement with Sun. The obvious choices here are ash and soul, as they turn an already good schemer into an interact god. Excellent option for 7 stones ook. Set up his upgrades when you don't need the extra interactions, then on turns where things are close he can swing the score from weird angles your opponent won't be expecting.
Mourner
For the cost of a terror or rabble riser you have the option to ook a mourner. This is a fun choice for Conductor and relatively useless for Havoc. While the Funeral Procession ability is an iffy choice for card usage in a crew that wants to sculpt the perfect hand and use all of its cards wisely, presents an interesting option for scheme marker creation. can be copied by Marshal as well making this cheap access to a copyable magic attack to give out slow. They also have the ability to give themselves which can help layer defenses on your models if positioned well. If you have the stones they're worth messing around with and have been very effective in some games with a bit of luck and some decent set up but definitely more of a fun choice than a competitive one.
Anna and Undergrad
Anna is an excellent target for eerie echoes as her is a powerful choice for Marshal's and she is capable of slingshotting your models across the board for a stone with her . Because of this she often makes it into my Havoc plant explosives lists, usually hired with an undergraduate and 2 night terrors. Anna wants to be far enough up that you can get good range for reverse gravity throws. Once Anna is in position you want to activate the undergrad and discard a card for by your side. When this place is resolved burn a stone to place 6" away from Anna and you can put the undergrad into charge range with 2 actions available, making it a viable option to charge in, attack, use the trigger to take student of viscera's and hopefully evolve into a viscera in your opponents face early turn 1. This is relatively easy to achieve with a single severe in hand. When you want to start dropping bombs you have night terrors leap 6" to be within 6" of Anna, then stone to place them on the opposite side of her 6" away and ready with 2 AP left to fly over the opponent's backline and drop bombs. Anna herself can hit decently well, and if your undergrad becomes a student of viscera her signature becomes quite powerful. My not so secret tech made far less secret.
Monty
An interesting ook beater, Monty is usually a 3 attack min 3 model whos melee targets sp, has good triggers and the ability to stagger on the attack which will allow you to hit harder with his trigger to be at raise 3. He also gives toss the noose which Marshal can copy to increase the amount of slow your crew hands out and reposition the enemy model. Very solid big boy, terrifying and his demise means that he takes some work to put down. I've had good games with him as an ook beater for Havoc Molly. For slightly cheaper a will provide similar effects.
Rafkin and Ghost Eater
Ghost eater and Rafkin both offer access to solid damage 3 magic attacks that Marshal can steal. Ghost eater's attack can ignore some defensive tech, and Rafkins removes tokens from allies as a cost. Ghost eater has a better melee and can summon while Rafkin can give himself . Both are solid choices if you want to give Marshal a good attack but they're investments in a crew that should be spending its stones elsewhere.
Leading the Parade
To get the best use of Parade Molly you want to focus heavily on the remains synergies. The goal should be to set up enough remains that you can take full advantage of and cycle through your deck. Molly herself will be at the center of the parade using her baton to pull models into your crew and directing her friends to punch the kidnapped model. To get the best use from pair up models who you are ok having take general actions with your more important models. In this crew Molly and Strange Lady should never walk and instead should be told to Walk with Pride by someone like Nephilim or the Effigy. In set up your cans where two models can stand spaced out perfectly to use walk with pride to kick two cans for a stone and an action. The more you parade around the more this crew will make sense so try to put it on the table and lean heavily into the crew card to figure out how to conduct. Once you have that sorted try introducing Sun Quiang and leaning heavier into the remains while bringing just enough keyword to maximize the use of walk with pride without losing access to the powerful remains package. A good intro list is below
Sowing Discord
Havoc Molly is harder to explain an overall playstyle for. The crew wants to focus on control and does best bringing models like Philip and Rabble Risers alongside the usual Strange Lady and Marshal. Try to use and for the majority of your scoring, and once you have secured score for the turn focus on denial and disruption. Havoc Molly is one of my favorite masters because of her playstyle being as reactive as it is. Necrotic Machine, Molly, and Strange Lady call offer amazing scoring utility once you know how to use them. Learn to read your opponent's actions so that you can learn how to deny their scoring and Havoc will be a nightmare for your foes to face. Make sure you use in this title too, the extra difficulty on your opponent may be enough to force errors which Havoc can capitalize on. A good intro list is below
More Advanced Lists
The following lists are for once you have a grasp on how the main crews work. The lists lean more into gimmicks and have potency that can be back breaking if played well.
Conductor
For this list try to focus on maximizing the use of all of your resources. Use Sun to scheme from weird angles, keep your parade on route with Molly, and see how far you can push your crew to go.
Havoc
This list is all about yeeting. Yeet your undergrad at the opponent, yeet your terros into their backline. Try this one in plant explosives with the intention of cranking up the pressure with your minions then late in the turn having Molly and Strange Lady exploit any of your opponent's misplays while trying to deny them any scoring for the turn.