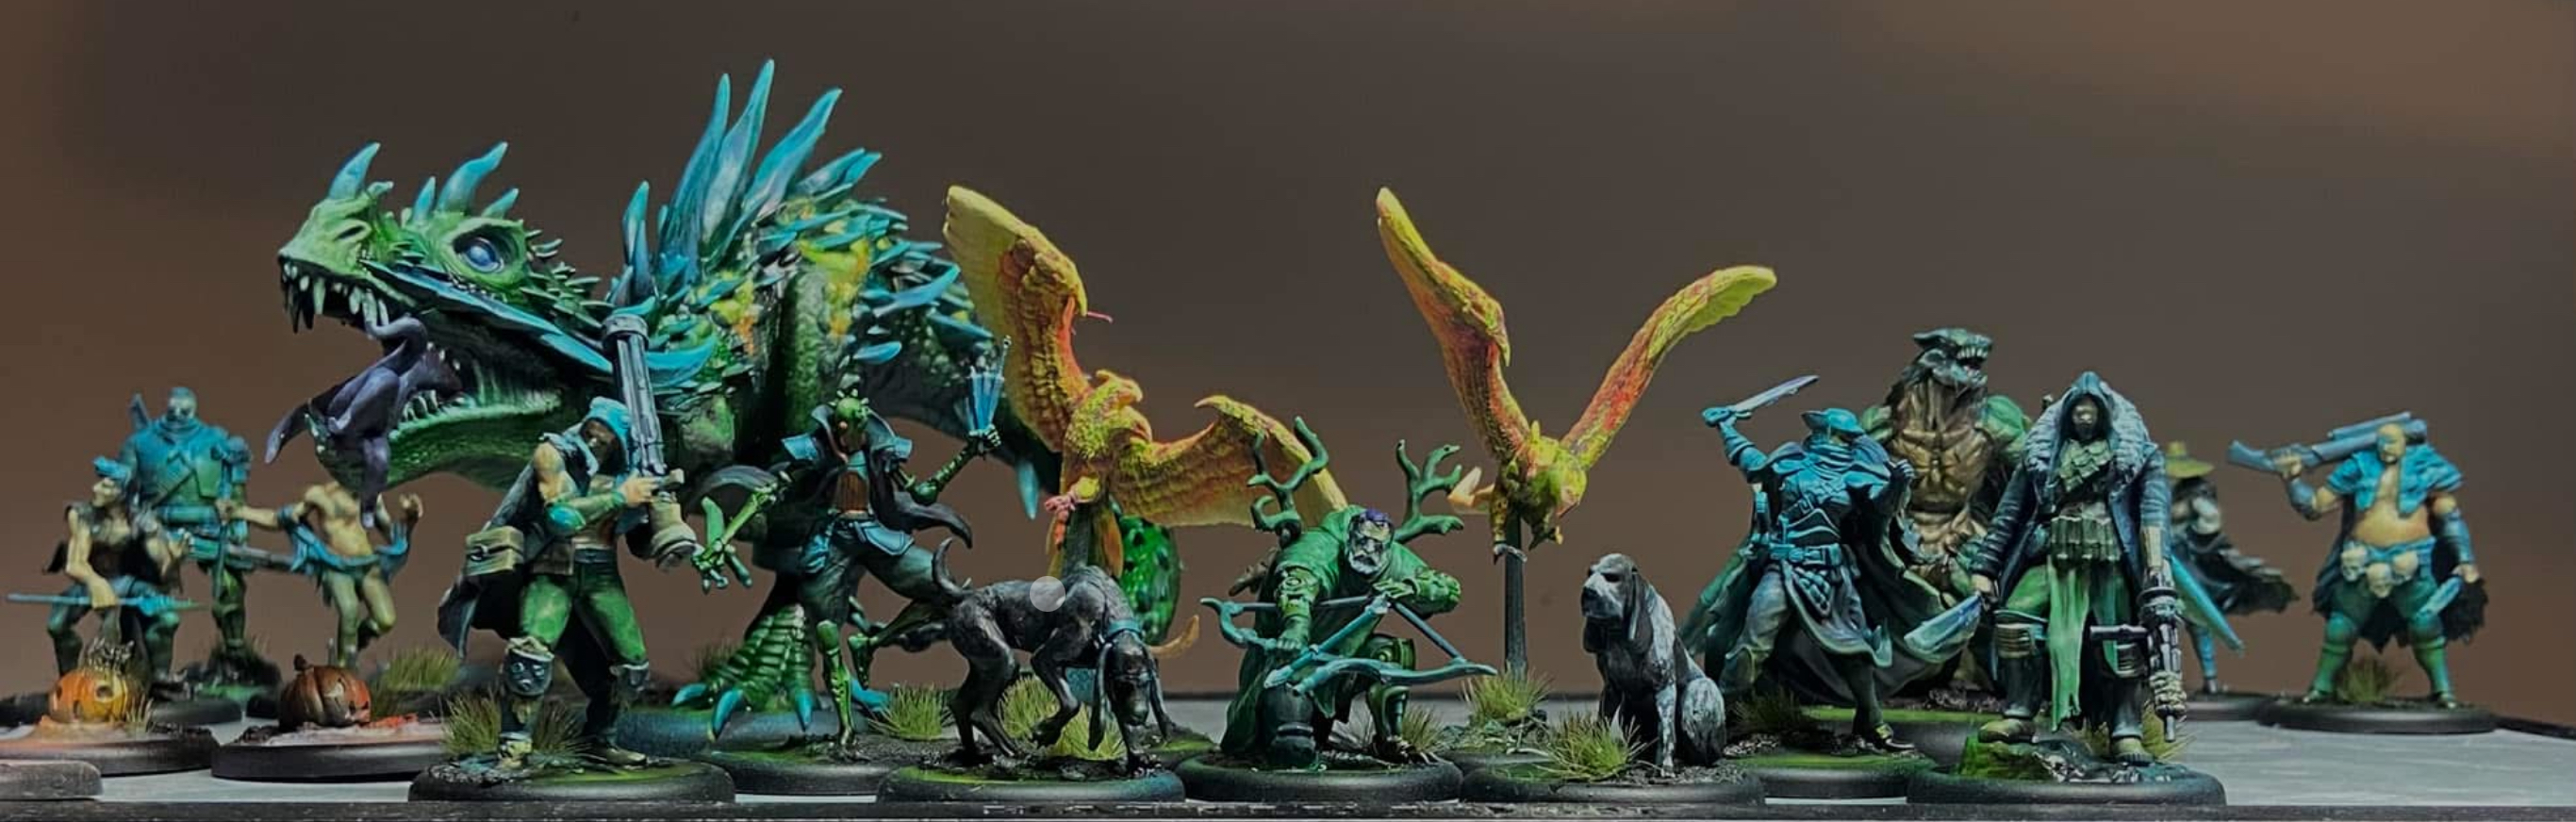
If you entertain the idea of sitting quiet kneedeep in bayou muck, waiting for a big toothed beastie to fall into you’re carefully planned trap, and giving it a swift and merciful death before chopping it’s head off and mounting it on your mantle, just might be the crew for you.
PLAYSTYLE
LCH is at first glance a simple shooty-beater crew; you aim to kill the enemy, then score some points, when there aren’t any opposition left. Diving a little deeper, you get to understand the discrete speed that allows the crew to put in a little extra effort to scoot into the right position at the right time.
CORE MECHANICS
is the backbone of the crew. Ignoring concealmeant is one thing, turning it into is something completely different. Combined with it gives a rare card advantage that few crews can compete with in M4E, allowing you to conserve your hand for defensive flips and tactical actions.
Concealment the crew is able to provide it’s own concealment, which of course puts a bigger drain on your opponents hand. This combined with being able to preserve your own, means that the Huntsmaster crew is deceptively resilient.
Out-of-activation and chained attacks the mechanic allows you to control the field, and it’s not unusual for an enemy model to end it’s activation taking 5+ damage from a shot powered by Silent Stalker. While Cooper and the Malisaurus both enjoy -triggers, while , , and are all able to trigger shots from others with their attacks.
is at a glance your most underrated ability, but it repeatedly becomes the thing that makes all the difference, between making the kill and scoring points.
Prepare: it might be a generic ability, but it’s key to a Huntsmaster crew, ensuring you hit your triggers and make the most of all your and out-of-activation attacks.
So to make the most of your crew, means you need to setup those chain attacks, while benefitting from the abundant to ensure success.
MODEL BREAKDOWN
is your main attack vector. Able to pump out 6 Dam3 shots in an activation. He enjoys the benefit of StA, being able to move 7” into position and giving himself a token, and threatening a 12” bubble. At a pinch he can even push models off of buildings, but mainly you want the damage he offers. Keep him close to blocking terrain for the Cover bonus and out of melee, so he can make use of his tokens. His is a nice safety valve allowing you to overextend your models in going for the kill.
you’ve got two of these, and they’re amazing. push the Malisaurus into Stat6 and Lord Cooper into Stat7, while the combination of and Can push their damage potential far over, what anyone could expect from what looks like a schemer-totem. Sadly, because of their signature action, they aren’t all that great at scheming, but they are great at the denial game, potentially moving 26” deny a strat marker etc.. Points denial and force multiplication is what they’re all about - I’ve yet to need their card draw ability, but it doesn’t hurt.
your dino-missile is fairly point-n-click. Reserve some and for it’s triggers, and it’ll deliver. is a great way to control positioning. Treat it well and it’ll eat masters for breakfast, but keep it away from Wp attacks like Obey.
a scourge of M3E, but sadly Lord Coopers’ spare part robot has lost a lot of his punch and resilience in M4E, and sadly it needs a heavy investment in cards and soulstone to reliably function, and you already have plenty of outlets for burning those.
is what pushes Model 9 out of the crew. Cheaper, more resilient and able to function from a mere 7. Kainhearse is a support model, allowing a model to charge, while handing out to beasts (Ahool, Malisaurus, dogs and birds). This means Kainhearse’s most important purpose is to take position, all of his attacks and interacts are just gravy on the top. He holds a special synergy with Ahool to trigger attacks, but this is one of the least damaging attack chains in the crew.
is a one bat combo machine. Able to move fast, then trigger shots on it’s attacks that get from , meaning you the bat monster has a far greater damage potential than what the profile shows. Alternatively being able to heal from it’s attacks allows it to hold it’s own against stronger opponents. So in the end, you get another great disruption/denial peace, it’s even got to control positioning.
is your best boy. Another source of while having the -trigger, allows Ullr to hit far above his weight class. His -ability is your most reliable way to top up on tokens. And being a unique model with acces to StA allows Ullr to pull schemer duty. Ullr is the most versatile model in the crew, able to change gears on a whim.
is your best girl, and the only dedicated schemer/anti-schemer in the crew, and that is her job. Her most useful attack is to control positioning, aside from that it’s all about enjoying her being and .
is the go-to minion of the crew. It’s tempting to load them up on and tokens and park them on a rooftop, and enjoy the threat they will project - from a Dam4+ shot with . But to make the most of them, you’ll want them closer to the scrum. Being aggressive with them allows you to aggressively seek out targets, while supporting the rest of your crew with tokens and cheap interacts.
look amazing on your display shelves. It’s not that they are bad, it’s them being in competition with the rest of the crew - which is a lot to say for a 6 cost model with Health8 and HtK. They do have some cool features, and if you’re up against a crew that employ a lot of terrain markers, they’re definitely worth giving some thought, due to their ability, that pushes opponents around and removes their markers.
Outsiders I’d generally avoid those versatile and OOK, partically because the crew synergy relies being in keyword. Few exceptions like the can make for an exception, particularly if they can make up for the rest with regards to scheming without losing too much aggression.
SUITS TO SUIT THE JOB
One of the most important things to remember is to reserve what cards for what purposes. Triggers are important to the Apex crew, they’re what determines to outcome, and Apex enjoys a fairly balanced distribution of triggers - here’s some of the most important ranked after importance:
| | .
| |
| |
PLAYBOOK
Most games will open with Crypsis Corps taking position, handing out Concealment/Reload, Kainhearse helping a beast into scoring position, then moving towards an unavoidable central scrum. Ullr will follow up on handing out tokens, while Artemis will try and find an unused flank, then the birds will hit the opposing stragglers, setting up a volley of fire and unleashing the Malisaurus.
T2 should have Ullr close enough to the action, so he can By Your Side in, while Cooper and the Malisaurus should feast their eyes on taking out the opposing master - cutting the head off the dragon. You’re unlikely to score any schemes T1, so focus on the strat and taking 2 points/turn following this.
In the end, your Malisaurus should have created mayhem to allow the rest of your crew to set themselves up for kills.
FINAL WORDS
Apex has been my entrance into M4E after a long hiatus after M3E, and I really enjoy the crew, It has tremendous firepower and when you concentrate that power on single models, they just vaporize. It’s a very forgiving crew due to the amount of cards flipped, and you’ll like go through the whole deck every turn. This means, that getting the Black Joker in hand and keeping it there can make a world of difference. It’s a great crew with high replay value that prefers play in-keyword, where you mostly rely on a generic setup to handle most situations. This means it is also a great crew to learn the game with, as you quickly come to grips with the crew, and so can concentrate on the objectives and understanding your opponent.