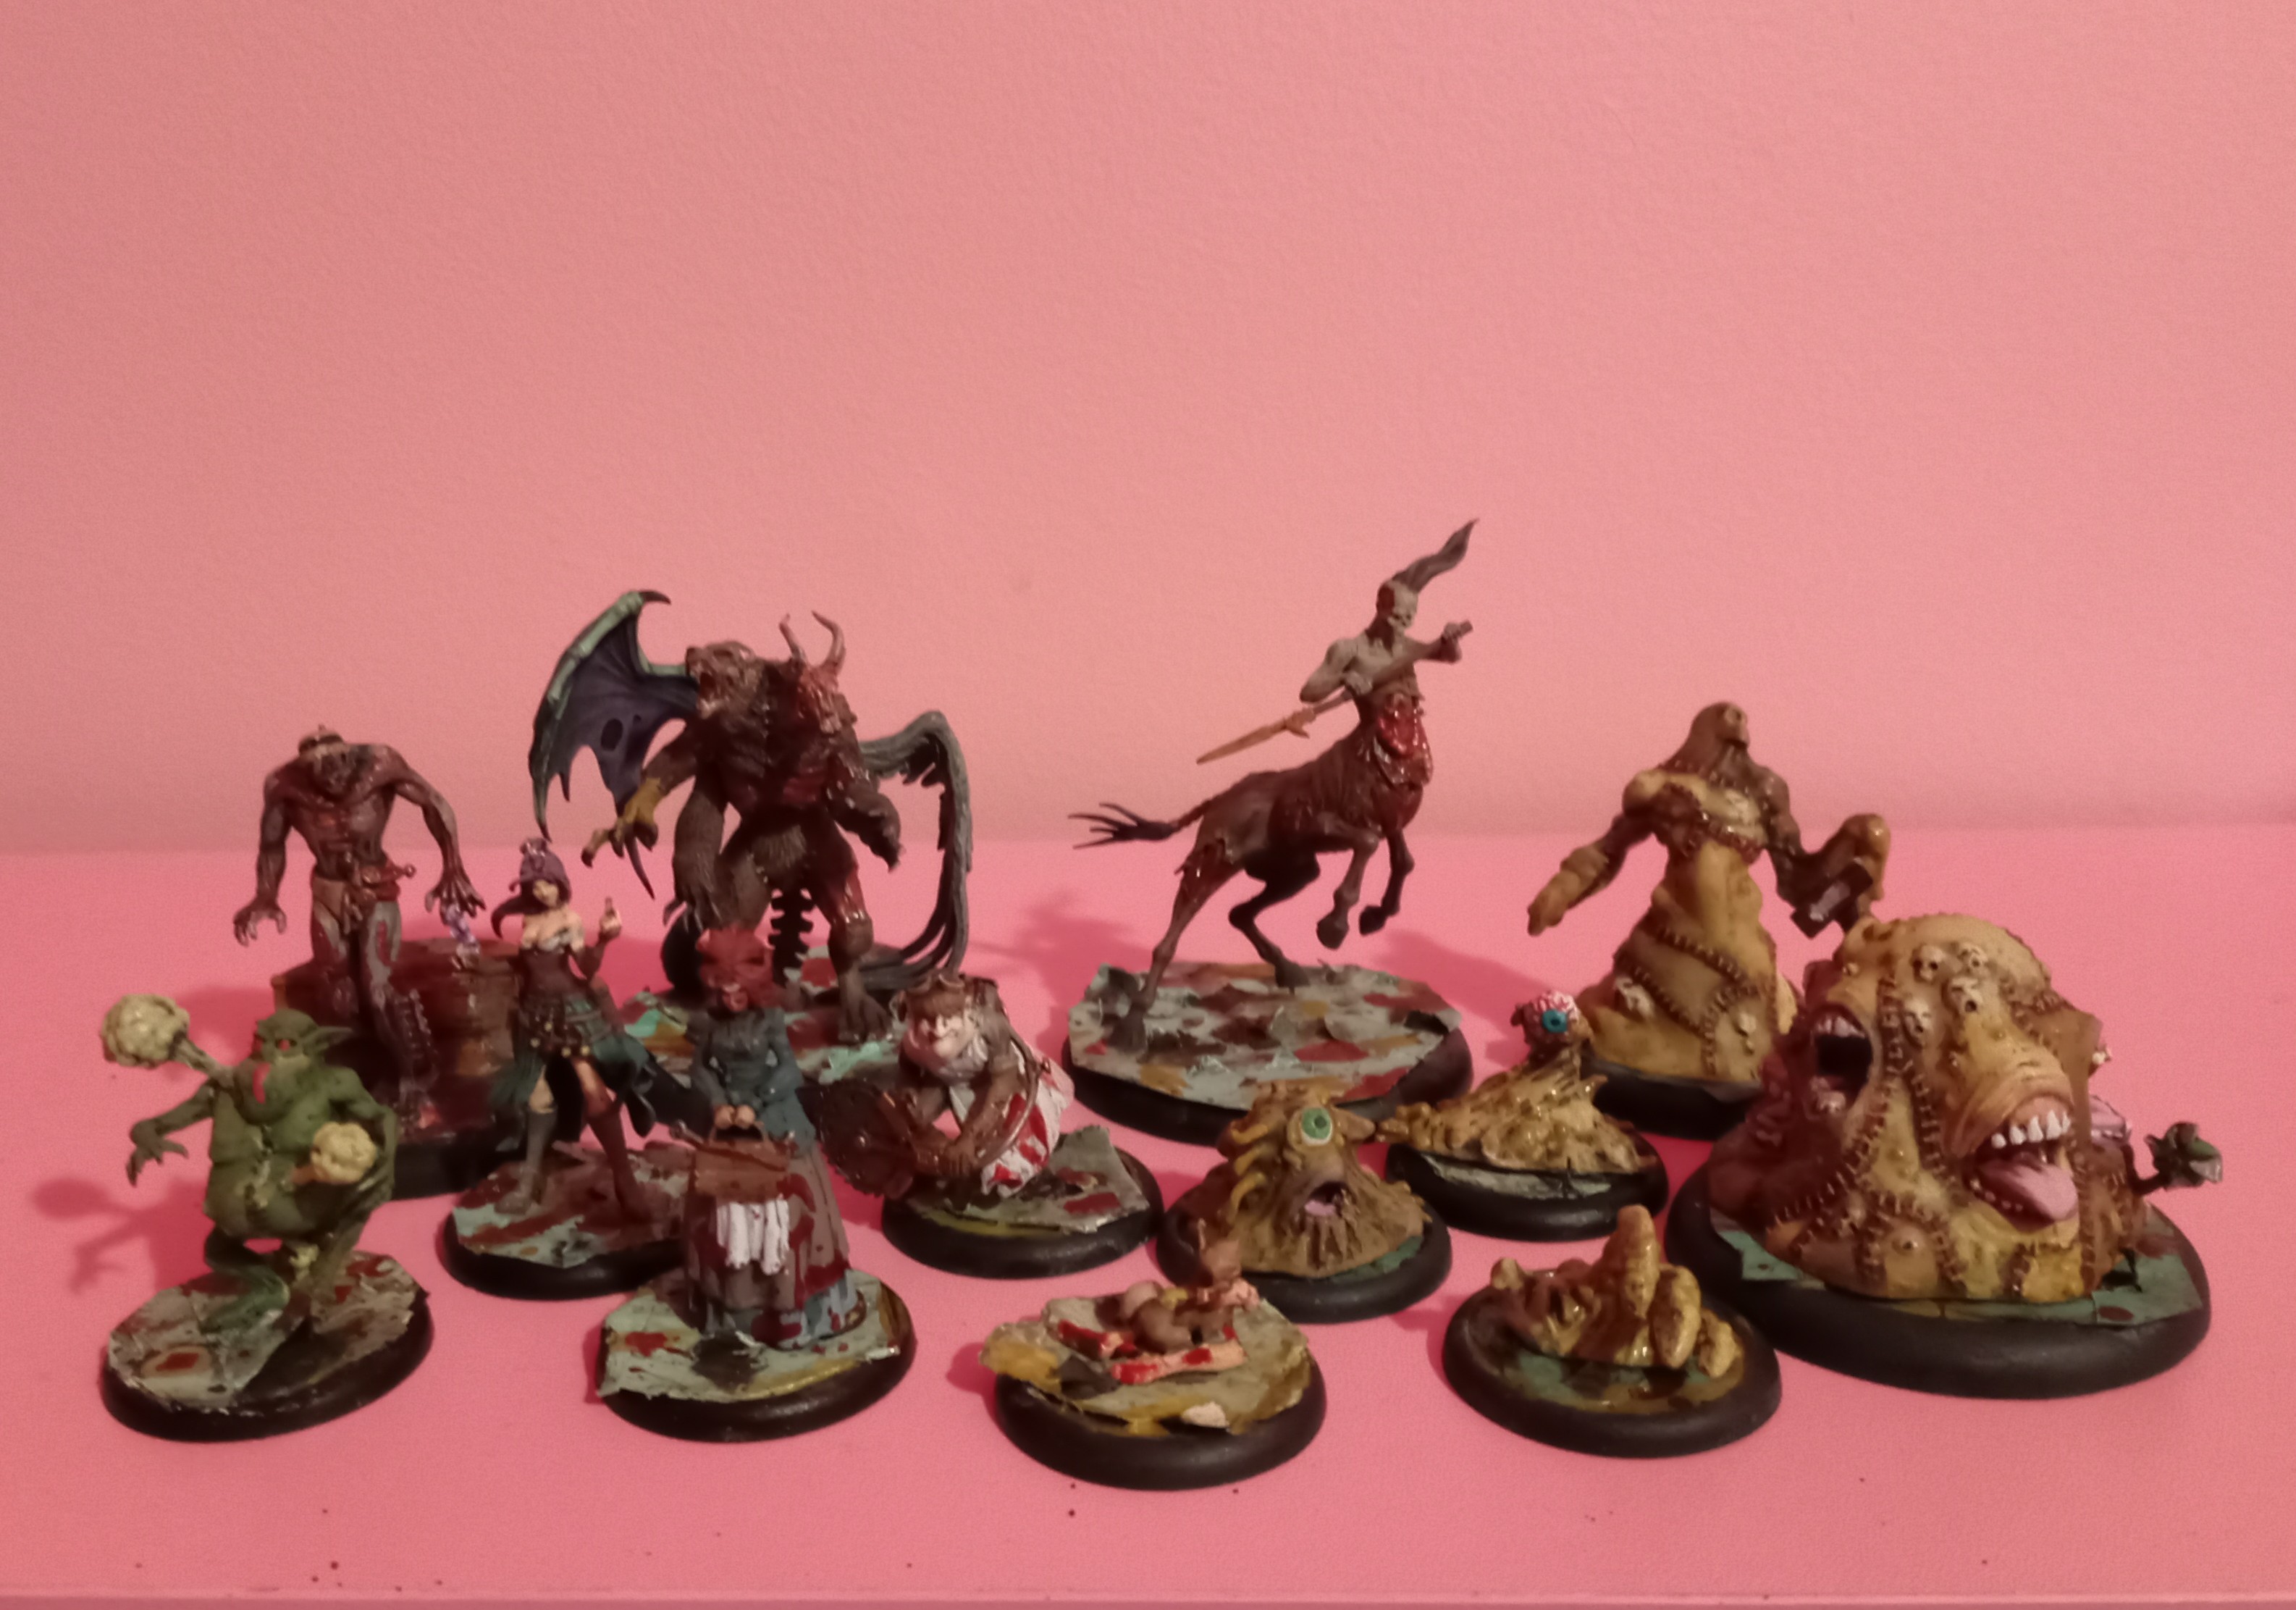
Interested in a career performing experiments on mounds of flesh and gaseous corpses? Obsessed with mad science and not afraid of yucky smells? Want to use science to animate bodies and poison your foes? This could be your future under the tutelage of Dr. McMourning, Malpractitioner.
Playstyle
(who will be called Doug going forward) is a master that requires practice to understand, but will reward that practice with a unique playstyle and mechanics. Doug is a summoning master with a resilient crew, solid damage output, and the ability to turn summons into scoring models. His lines of play can take some time to fully understand, but learning them can make Doug into a rewarding and unique master that plays Malifaux in a way your opponents can have a hard time responding to.
Core Mechanics and Crew Card
is the primary source of Doug’s power. You’ll use poison for summons, healing, extra damage, and can even poison your own stuff to damage it in the end phase and splash out more poison using the strongest thing on the crew card, . Bloated Stench gives every experimental model armor, except they will also splash poison onto enemies. This ability drives the crew, making them resilient and enabling your summons. The crew card also gives unique experimental models the attack . This attack has a high TN to gatekeep access to two incredible triggers. The first is It’s Alive! which deals 2 irreducible damage to targeted ally to remove their summon token. This is an amazingly useful trigger that can turn summoned Flesh Constructs or Kentauroi into scoring models. The second trigger is more situational but just as powerful. For 2 stones you can deal 2 irreducible damage to target ally to give them an token. These tokens make the ally be affected by the enemy crew card as if they are a unique model allied to the enemy leader. This allows you to do things like give your master access to or have your flesh construct be affected by Euri, Hierophant’s crew card, as well as making enemy hazardous markers ignorable. This is incredibly strong in specific match ups, so look for opportunities to use this.
Other Shared Mechanics
appears throughout the keyword and pairs well with Bloated Stench to make experimental models hard to put down even with low defensive stats. Several models have access to , another unique token that makes the area within 3” of the model inflict negative flips on enemy attacks targeting friendly models. This stacks with Carrion Emissary’s , and pairs beautifully with Rogue Necromancy’s . Doug and Sebastian both have , doing pings of damage to enemies activating with a poison near them. Catalyst is easy to forget but the damage can add up, especially turns 2 and 3 so keep this in mind when positioning Doug and Sebastian.
Summons
The last big thing to cover before moving into keyword models is how the crew summons. Doug has a tactical action with an 8” range that removes at least one and up to 3 poison to summon an experimental model with health equal to twice the number of tokens removed. This summon has a mask trigger to give an token, or a stone trigger to heal 4. Options for summons are at STN 8, at STN 7, or at STN 4. Gassers can be summoned off of various triggers so unless you can’t summon anything else they are rarely worth summoning. The best summons tend to be Flesh Constructs at 6+ health, or Kentauroi with low health to act as cruise missiles that give out unresisted poison, do some damage, and disrupt the enemy before dying to be resummoned. Flesh Constructs are prime targets to have their summon token removed with , and should be priority summons to help apply pressure and threaten scoring.
Brief Model Overview
Dr McMourning, Malpractitioner: The Dr himself is a versatile master. His front of card gives him access to healing when he damages poisoned enemies with his scalpel and gives him Precise to help punch through some of those pesky defensive abilities. Back of card has 3 actions that are all great and should be the bulk of what Doug does each turn. is a 2 DMG SKL 7 attack into DF with raise 3 and several useful triggers, including a stone trigger to resummon his Chihuahua. Against low DF models this attack can spike damage hard and makes Doug excellent in combat. His second action is magic attack , also SKL 7 but vs SP, with a built in reposition and a crow trigger to generate a . This attack and the crow trigger allow Doug to set up and summon in one go, with the stone trigger on his summon to heal 4 allowing easy 6 health Flesh Constructs. Do not make this man walk, put him where he can use his 3 actions and signature on the actions printed on his back of card as they’re all very impactful.
Zombie Chihuahua: Tougher than it looks, resummonable, with a deceivingly strong attack. When it ends activation it splashes poison onto enemies in 2” and can blow itself up to draw 2 then discard one and splash poison 4”. The best action on this card is to give itself an . Send it up the center, make it smelly, and let it harness electricity to bring life to your summons. This stinky pup is also a viable target for once it has been resummoned.
Sebastian: reasonably resilient with some mobility tricks, the main reason to bring Sebastian is his saw. Dmg 3 melee with a built in trigger to remove a poison and take the action again, and the stone trigger to teleport himself or a friendly master to an enemy within 6”. Not an auto include but a fun choice for a synergistic beater.
Rogue Necromancy: big guy has some very solid tech. makes most models unable to cheat while attacking him, and means that any hits for 3 or more that get through will make Rogue Necromancy fast. A solid attack and a 3” leap that can be turned into a 10” leap for a stone with 4 solid triggers attached. Rogue Necromancy is an excellent counter schemer and can eat enemy schemers, or can be given to make him incredibly difficult to put down so he can go head first into danger. Just watch out for as this big softy is only DF 4.
Leftovers: potentially one of the best models in faction, carried by its unique mechanics. Leftovers has a demise that turns it into two which in turn have a demise to become two . All models in this chain are scoring models. If Leftovers lives until turn 4 when its activation ends it will die to itself to create a strategy marker and 4 scheme markers using its ability . This will trigger the demise as well, which will then kill one bisection, followed by killing one last bite leaving you with a strat, 4 schemes, a bisection, and a last bite. This can swing games, hugely impacting scoring for strats that care about strategy marker placement or control as well as enabling scheme scoring. Leftovers also traps enemies in place using to make enemies only able to move by walking which can help ensure scoring. makes them incredibly hard to pin down, and is a signature on Leftovers but present on all models in the Leftovers chain. Bisections are mini Leftovers, and Last Bites are 2 Health annoyances with .
Rafkin: I hated this model my first games playing him, but once he finally clicked for me he became an auto include. He’s squishier than everyone else and is likely to die during the game, but he really lets Doug’s summons shine and can put on an ally. He should almost always put out an aura a turn, then use his magical attack to remove slow tokens from summons and deal damage to enemies who are still a bit too tough for the minions to finish off. Removing the token is a cost so even if the attack fails your summons lose their slow, but if it hits it will heal the ally that the token was removed from equal to damage dealt. As the attack is dmg 3 this plays very well with flesh constructs, allowing you to set them up to activate with a full activation. Between , , and this is another model that prefers to use all of his action and doesn’t like to walk. Keep him near a model with Fumes up and his lack of defenses becomes far less of an issue. For 7 stones he is a valuable package.
Kentauroi: fast and surprisingly hard hitting, hire at least one of these every game. is an amazing utility to help with unpack and get out of combat, but the real reason to bring these is unresisted poison. allows Kentauroi to deal one to themselves on the charge then deal one to enemies in base contact. This will trigger and while it won’t reduce the damage it will splash poison unresisted without your opponent being able to react. These are invaluable to getting the poison engine running, and low health Kentauroi summons help to enable later summons and apply pressure to your opponent.
Flesh Constructs: these are the primary summon for the crew. 9 Health, , and make them harder to kill than a 5 stone model should be, and they are excellent candidates for having their summon tokens removed. can be used to remove slow, or to gain fast if slow has been removed by someone else. A summon that can score and has 3 actions makes a big impact on the game and is one of the most unique aspects of this version of the crew. Summon them at 6 health for 2 poison and a stone, remove the summon, heal them with Rafkin’s , and profit.
Little Gasser: summon these off , don't expect much, and you'll be pleasantly surprised. is situationally useful and capable of flipping an enemy marker into a friendly one, but the most consistent use for these is their demise. Summon them when you can, don’t force them and they can be surprisingly helpful for pushing damage. The best worst pinatas ever.
Versatiles
pairs well with the crew, providing extra protection through terrifying presence, giving a solid attack, and flying your crew to where they need to be. If not bringing Emissary then consideration should be given to as a cheap source of extra . has solid play with the summons, removing tokens unresisted on activation and being able to toss them in the mud. is always useful to Resser crews, and her corpses can help Sebastian and Chihuahua gain some extra mobility. is an excellent healer for this crew as they can readily get rid of the slow tokens he gives out. is maybe the worst of the 3 stone versatile minions in the game, but when you need a cheap body to stand on a marker they can provide exactly that and nothing more.
Card Considerations
having high skill means a 12 or 13 is likely to hit, so saving those for his activation will almost always pay off. A high crow to cheat and give Doug an extra summon off the trigger is a great way to maximize his action economy and should always be a priority if a high crow is in hand. Raise 3 means Red Jokers can be turned into huge spikes of damage if you wait for the right moment, so it is likely worth saving any drawn Red Jokers for Doug’s . Low crows are great to empower your uniques and push through triggers to get a . Several attacks also have ram triggers for increased damage, so using low rams to empower attacks or high rams to cheat them will help maximize damage output.
Best Strat: Informants, Boundary Dispute
Best Schemes (highly subjective): Public Demonstration, Take the Highground, Assassinate
Assembling the Corpses
Malpractitioner seems to work best when played aggressively with a focus on applying pressure from various directions. Early in the game the goal should be to start applying poison and get Doug set up to summon. The best games with Doug should have 2 Flesh Constructs summoned before the end of turn 1, with the intention of removing the summon from at least one of them and topping off its health as much as possible. Spending stones to remove summon tokens will refund the stones if those models die, so spend away. Crews can struggle to deal with multiple models that can be made scoring being summoned into the middle of the table turn 1, and it keeps pressure on the opponent while your crew picks apart high value targets with bursts of damage. Turns 2-4 Doug wants to be in the thick of it, summoning as needed and trying to force through damage with his Scalpel, usually alongside another beater while the rest of the crew focuses on strat and scheme. Rafkin needs to be kept back a little but should be trying to apply Aura Fumes each turn along with removing slow from summons and dealing ranged damage to pick off wounded models or set up big kills from the crew’s damage dealers. 20 games later and Malpractitioner remains the most interesting Ressers master to me, and I hope this guide can help open up his lines of play to other people.